In our last installation of this guide series we told you how to overcome the first match against Black Cat. Today we will go over the next fighter in these series of matches. This is the hardest fight in this raid series for good reason between the flashing lights and mechanics going off players might be overwhelmed. So without further ado let’s get fighting.
How To unlock AAC Light-Heavyweight M2
This fight won’t be available until players have cleared the previous match. So if you need help clearing AAC Light-Heavyweight M1, we have already prepared a guide just for you.
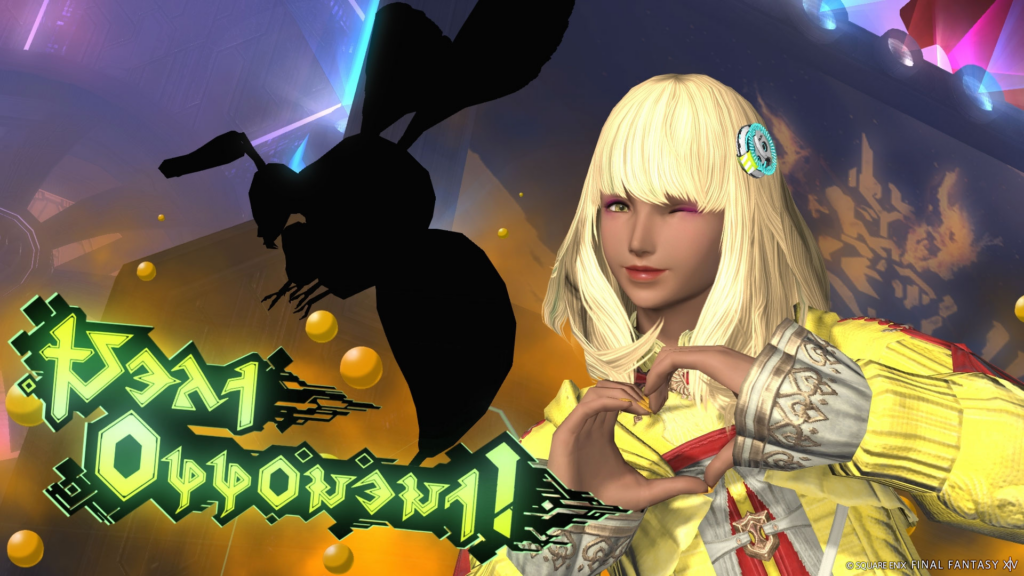
Once players have cleared M1, there will be a new quest named Sweet Poison will be given to the players. This must be completed with to get M2 unlocked. Once it is players will need to have a minimum iLVL of 885 to be able to take part into the competition. This will be the second time players will see the idol of the ring Honey B Lovely.
Take Your Heart
Honey B Lovely takes her position in the ring and the adoration of her fans very seriously. This will be expressed in her mechanics that involve a very general adoration mechanic. So, be ready to fall in love with her.
Phase 1: Let the Show Begin!
This phase includes many attacks that will need to be dodged as well as her signature mechanic. The fight will slowly ease you into each mechanic as it is introduced.
- Call Me Honey – The fight will start with this attack and will hit the entire party no exceptions. Healers and Ranged DPS should prepare to mitigate and heal from this attack.
- Tempting Twist – A large clock-like circle will appear around Honey B. players will need to move in close range to her before the cast goes off to avoid damage. Ranged DPS should keep close enough to easily run into the safe circle.
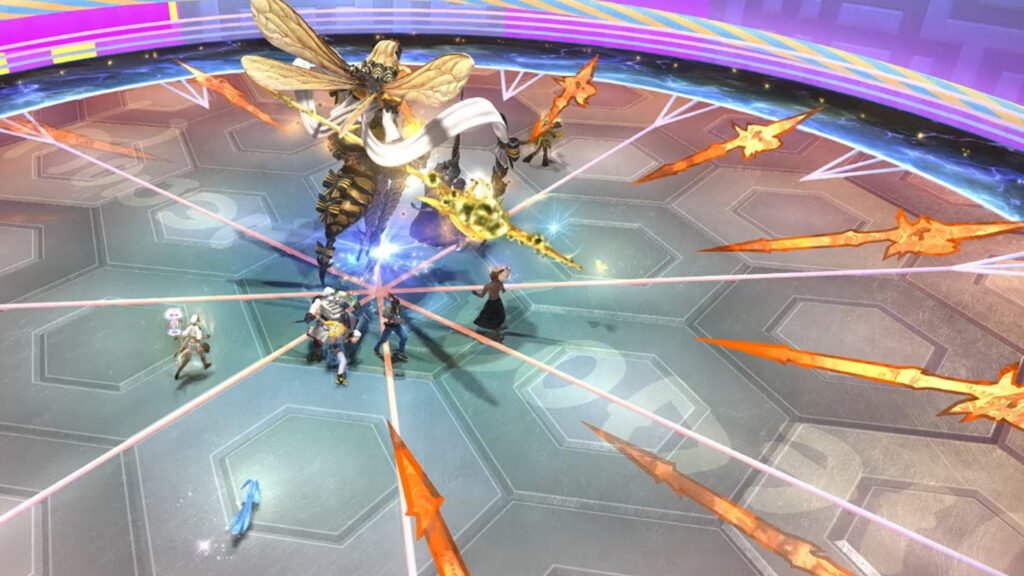
- Honey B Line – A line will appear above Honey B. this will indicate where the line is going as the attack will hit in a line filling that portion of the stage. Players will need to move out of Honey B’s vicinty and the area the line faces to avoid damage.
- Honey B Live – This attack announces her signature mechanics and will say that she steals the spotlight. This will deal damage to the raid and then make three empty heart containers appear above each member’s head. From now on each attack will fill a container and if all three are filled that player will take damage, be stunned, and suffer from a heavy poison effect that will kill them. It’s possible to heal through this but should only be done as a last resort.
- Love Me Tender – This makes a pink circle appear below every raid member, everyone needs to split apart before this attack lands. It will add one heart to your containers and getting hit multiple times will fill in multiple containers for each one.

- Love Meteors – This attack isn’t explicitly named but appears after every Love Me Tender. These need to be taken by a single party member each as it will fill up one heart to whomever gets hit containers.
- Love Seeker – Honey B will position a large circle around her that will damage all raid members near her. Afterwards she will start spawning hearts that won’t deal damage but will fill one container up if a player touches one. These need to be avoided at all cost.
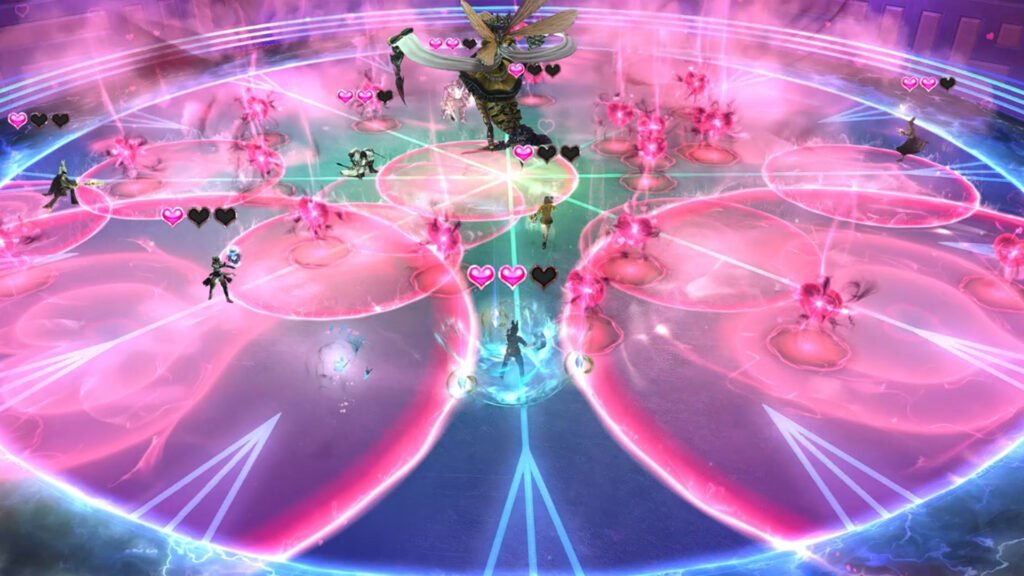
- Love Me Tender: Love Seeker Version – She will now cast Love Me Tender again but this time will work differently as this attack will be ongoing and will spawn a circle under each raid members feet as well as big ones on the edges of the arena. These can be avoided by moving out of the circles as they spawn. The hearts will continue to spawn during this and needs to be dodged as well. This lasts for approximately fifteen seconds.
- Blow Kiss – Honey B will face a random direction and prepare to attack in a cone in front of her. Players will simply need to get behind her to avoid the attack.
- Love Me Tender: Blow Kiss Version – She will now cast Love Me Tender once again being changed up again. This time circles will appear first around the around and then the middle that will explode in the order that they appear. Players will need to gather in the center and once the circles start exploding move over to a safe spot. This attack like all others will add one heart to your total.
- Honey B Finale – Honey B will end her live by hitting the entire raid for damage. Healers should prepare to heal and mitigate. While Tanks and DPS should prepare their party wide damage mitigation techniques now.
- Honeyed Breeze – This is a Tank Buster that will deal massive damage and kill anybody that is not a tank that is hit by this attack. This will target both tanks and cleave in a line directly in front of the tank and behind them so players need to get far away from both tanks. Healers and tanks will need to heal and mitigate this attack respectively.
Phase 2: Venomized
Honey B begins to get serious by coating her stinger in a poison, this will modify each attack that she does. It appears to happen at around 70% health or after her first Honey B Finale.
- Honey B Twist / Honey B Live: These skills remain basically unchanged from Phase 1.
- Splash of Venom – Honey B coats her stinger with poison this will initially do nothing but her next attack will drop honey on the stage that players will need to find the small gap between them to avoid damage. She will then do Honey B Twist which will then mark every player with a circle that says they need to separate.
- Drop of Venom – Honey B will once again coat her stinger with venom doing the same as Splash of venom dropping honey on the floor after using Honey B Line. Players will need to find the safe spot again before stacking together to share the damage of this attack.
- Love Me Tender: Venomized – Two stack markers will appear on two members these need to be shared by 4 party members each with no overlap. DO NOT STACK THESE TOGETHER. Healers will need to heal and any mitigation that players have should be used.
- Alarm Pheromones – Bees will spawn on the outside of the arena green lines will appear to mark where each one will strike players will need to keep aware of when the bees go and keep moving in a circle around the boss as this attack will keep going. After this the bees will appear on the outside again showing new green markers players need to move to the left and right of these markers to avoid the attack.
- Alarm Pheremones Mark II – After Finale Honey will cast Alarm Pheremones but changes as the bees will now attack randomly on the stage in straight lines marked in green. Players will need to avoid these and keep on the move.

That’s all, she will now rotate these moves in almost this exact order until she dies. This fight requires players to pay attention to each tell but once players figure out her patterns this fight will get easier. Don’t be afraid to die during this fight as it can be overwhelming at first.
As an added bonus, players will find that Honey B’s fight has a vocal track. We have carefully transcribed for the players wondering what is being sung while the chaos surrounds them: